Backcountry Ski rig for SAR
On the south coast, most below-treeline winter SAR is done using snowshoes. However, snowshoes are not always the most appropriate way to travel in the winter. Among the many reasons to not use snowshoes, the one that stands out the most is that they do not release. In avalanche terrain, having a ski that releases is paramount.
Now those that know me know that I am a big telemark skier (6’5”, 220lbs). However, I’m not “religious” – I have my reasons for telemarking, but when it comes to winter safety you choose your mode of travel to match the terrain. And the most common element of SAR is that you can’t predict what terrain you’re going to need to travel in. This means that you might need to move with snowshoes for a bit, switch to ski, and then switch to crampons. You may be in the alpine, and have to travel from there to sea level, or vice versa.
So this leads to some of my criteria for a backcountry ski rig for SAR
- Light: it has to be light because I’m going to probably be carrying it on my back at some point.
- Capable: it can’t be “race light”, or too fiddly because it also has to handle all conditions.
- Comfortable: since I may need to walk, use snowshoes, and crampons with this rig, the boots need to be “made for walking”.
The criteria led me to the following choices:
Boots
The Scarpa F3. This is not Scarpa’s lightest boot, but it is light enough. It has a bellows like my telemark boots; since I’ve walled over 20 km in one day in those style of boots I am confident that I can walk almost any distance I will need to. They are easy to fit crampons on, and they work with the MSR Denali-style snowshoes that most SAR teams are using. I have a lot of experience with Scarpa boots and I am happy with how they fit my feet.
My friend Lee provides a very complete review of the F3 here. There is another great review at WildSnow.
Bindings
Rather than going with the tried and true Fritschi Diamir, I opted for a Dynafit binding that is a balance between strength and weight: the Dynafit TLT Vertical series. These are Dynafit’s heavier bindings, which still puts them in the range of the lightest ski touring bindings you can buy, without being stupid light. They are recommended by many of my ski and mountain guide friends as a very capable binding, and strong enough to use every day. You can add brakes and ski crampons if you like.
Skis
As I mentioned in my post on ski widths, I subscribe to a slightly different view on what a good backcountry ski means. Choosing a rig for SAR means I’m not as concerned with performance as being able to travel; and while I don’t have style, I have mad skills at getting down any slope in one piece, under any conditions.
My choice of ski was extremely limited, but at least a few manufacturers have skis that are designed with touring in mind. I ended up with a Movement Red Apple 74. I got them slightly shorter than I would usually since carrying them is to be expected, and carrying skis in the bush is difficult enough. Short skis also make for easier switchbacks when ascending through dense forest.
Considerations
A small wrinkle with this set up; because the Scarpa F3 has the bellows, when you use it with a Dynafit binding you need to provide some support under the ball of the foot. Dynafit (also called “Tech” bindings) do not have a connection between the toe and heel portion of the binding (see image above), so the stiffness of the boot provides part of the integrity of the binding. If the bellows were allowed to flex, the heel could come free. This is not a problem with “traditional” AT (Alpine Touring) bindings because most of them have one or more steel or carbon fibre bars connecting the heel and toe pieces, and these provide the stiffness.
One solution is a part known as the “Dynashim”, pictured here (near the bottom of the page. This part fits into the Dynafit crampon attachment point; this complicates attaching an actual ski crampon. B&D; Ski gear makes a part that allows for a shim and a crampon at the same time if you need this.
Tip: the key to finding this part is to search for “Scarpa Slide Dynafit Adapter Plates” – this finds you the Scarpa-specific part at many online retailers. Once you have the SKU or part number you can contact your local store to dig this up for you.
Other solutions include building your own shim. Feel free to give this a try, let me know how it goes. I opted for the part from Scarpa. This makes a bit of a clacking noise at times, but since I’m used to the noise that a modern telemark binding makes it’s actually quite easy to ignore.
Testing
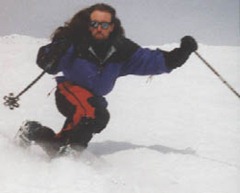
I put this set-up together last year during the Olympics. It’s not what I was using when I was photographed for the LA Times, those are a pair of older Scarpa Denali boots; much stiffer and heavier. I would have much preferred to have had the lighter boots for the Helicopter Rescue because I value being more nimble on my feet while working around a helicopter.
I did some tours on the new set-up last year, and it is scary light –much lighter in comparison to my two telemark skis and my other AT rig. The boots are extremely comfortable for walking and going uphill, as the bellows provides a very natural walking motion. Being a telemarker, I find this “kick and glide” motion to be second nature, and have always had some difficulty getting used to the almost robotic stride you need to use for other alpine touring gear. I found that these boots allowed me to adopt my telemark touring skills immediately. I imagine that you’d almost be able to skate like a cross country skier, given the right conditions.
As for performance, the skis are very light and easy to carry on the pack. After some practise, the bindings are easy to get in and out of. When in touring mode you can “lock” the binding so the toe piece won’t release, which is great for steep and icy slopes. I opted to install brakes so I can use this setup inbounds, and because it always sucks to loose a ski.
As stated above, I am a heavy skier, so I don’t have some of the problems that my friend Lee mentions in his review. Granted I haven’t taken these skis out too many times as of yet, and I’m not the best skier to start with, but I can manage to get into and out of whatever I’ve needed to. I won’t say much more about the downhill performance of the ski/binding.
Conclusion
I do not recommend this setup for the average skier. The gear choices were made with a very particular purpose in mind, that being an all-around set-up that could be used under almost any conditions, including dense forest, walking or hiking approaches, and switching from snowshoes and crampons. If your use aligns with this, then perhaps the information here can help. As always take this info with a grain of salt.
Leave comments if you have a similar set-up.


Leave a Reply